If you purchase a brand new piece of cast iron, it will either come pre-seasoned or it will come in clean, pristine condition ready to be seasoned by you.
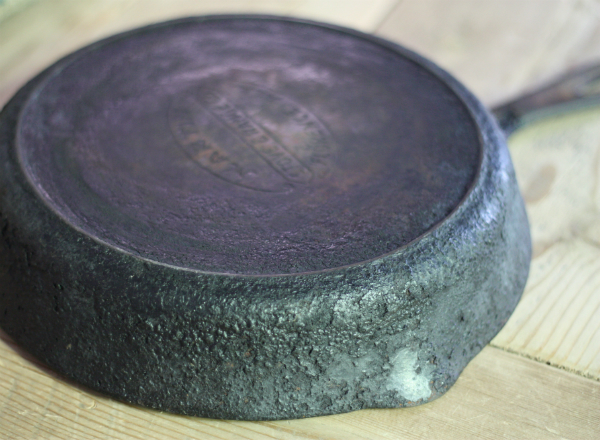
If you have been blessed with a family member’s cast iron or have been lucky enough to find a piece of vintage cast iron in an antique store or garage sale, chances are it will look less than pristine if not down-right butt-ugly nasty. It may have decades-worth of build up from improper care and be so covered in rust that it is nearly completely orange.
Have no fear, with a little tender loving care, you can have this kitchen workhorse back in beautiful black condition and ready for fried chicken in no time at all.
Restoring cast iron is a 3-step process and I offer two different cleaning methods for you to choose from. The ingredients you will need are patience and time (this may take a few days) and some elbow grease (this may take some scrubbing).
Step #1: Cleaning the Cast Iron
Oven Baking Method
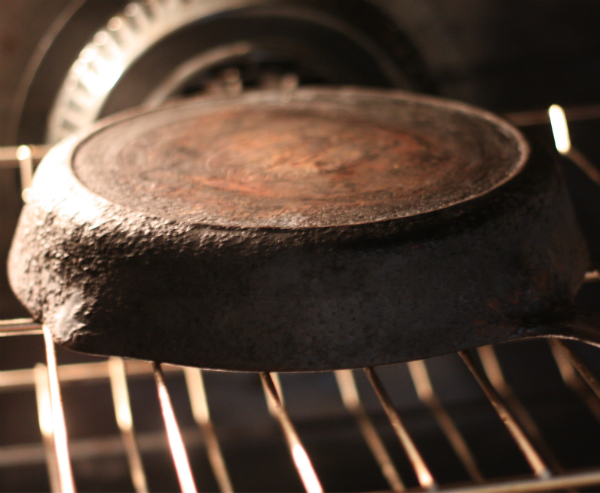
Laying a piece of foil on the rack below or in the bottom of your oven, you want to set your oven to the “clean” mode and place your pan upside down on a middle rack. Note: You may want to plan this part of the cleaning while you are out of the house. It does create some smoke and fumes that you might not want to be in the house for. Just remember — who knows how many years of grime we are removing? If you stay in the house, make sure the area is well ventilated.
After this cycle has completed and everything has cooled down, you can remove the pan from the oven. It will probably look gray and even rustier than before but any of the build-up or extra coating should have come off of the pan.
Oven Cleaner Method
In a well-ventilated area, lay down some cardboard and place the pan on the cardboard. Suit up like an astronaut or a hazmat specialist (long rubber gloves, nose and mouth mask, and goggles for the eyes). The fumes will be strong and you don’t want the oven spray to come in contact with any skin. Once you’re suitably covered and protected such that your own dog does not recognize you, spray all sides of the pan thoroughly.
After thoroughly spraying the pan with oven cleaner, place it into a large, thick plastic bag, and close the bag tightly. Set it near a heater to help things along, but too close that it melts the plastic bag or is a fire hazard. Wait about 24 hours, then glove up and take a look. After rinsing and scrubbing, you may decide you need a second treatment so suit up and repeat the whole process.
When you’re finished, the pan should be clean but it may look pretty rusty. On to the next step!
Step #2: Removing Rust
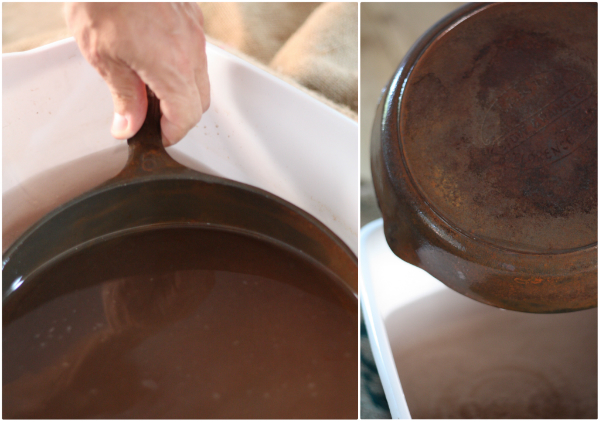
Place the pan in a tub and cover with equal amounts of water and white vinegar, then add a couple squirts of mild dishwashing liquid. You can leave the pan in this solution for 1-3 hours—the rustier it is, the longer you can leave it, just keep an eye on it. I recommend checking the pan at least every hour and change the solution if it looks too rusty. You really need to babysit this step because while the water and vinegar solution removes rust it can destroy the iron. When no more rust is bubbling up from the pan you should be done.
Be warned: When you take the pan out of the solution it will instantly start rusting because the iron is utterly unprotected. A very thin film of rust is unavoidable—we’ll take care of it in the next step. Don’t leave the pan in the vinegar indefinitely waiting for it to come out perfectly gray. It never will.
Step #3: Neutralizing the Vinegar and Prepping for Seasoning
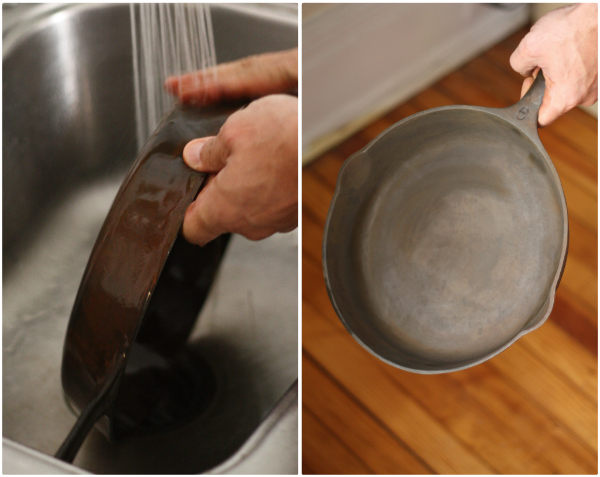
Remove the pan from the water/vinegar bath and immediately rinse it well with water and baking soda (base) to make sure the vinegar (acid) is completely neutralized. Do not pass go; do not collect $200. The pan is rusting as I type. Once it is thoroughly rinsed and the vinegar has been neutralized, wipe it down with paper towels or cotton cloths and dry it completely. Your pan should be free from rust, grime and general build up at this stage. If not, continue to scrub with paper towels or fine steel wool until buildup and rust have smoothed out.
Place the pan in a 200°F degree oven to make sure it is bone dry. It’s now ready for your first coat of seasoning.


Love the research you have done on cast iron. My methods of care were from past generations and they have served me very well, but you have given me a new awareness of proper techniques I shall adapt to take better care of my beloved cast iron.
Great article. What causes the bumpiness on the bottom and outer walls of the pan? I inherited my grandmothers cast iron skillet and admittedly did not know how to care for it. The inside is smooth but the outside walls and bottom are very bumpy and flaking. Is the method in this post the best way to rectify the issue? In an age where folks are trashing family heirlooms, I really want to restore this for future generations and appreciate any guidance.
Yes, it just needs a thorough cleaning to get old seasoning and rust off. Give it a good scrubbing and apply new seasoning and it should be good as new!