Under the Lid

Food facts, cooking techniques, and more.

Use More Herbs and Spices

This Saturday is More Herbs/Less Salt Day and I am reminded of my dad who had a massive heart attack when I was about 13 years old. By the grace of God, he survived it. Following his recovery, his doctor put him on a no salt diet and to make it easier on dad, mom and I went on a no salt diet with him. It was really hard at first, everything just tasted so bland, and dad was just miserable, but we learned to compensate by adding more herbs and spices when we cooked.

Because dad could no longer work, he started doing more cooking and it was fun to get into the kitchen and experiment with him. He was a marine and he embraced the Marine Corps motto of “Improvise, Adapt, and Overcome.” He was a problem solver and bland tasting food was a problem that needed to be solved.

Salt is a great flavor enhancer and aids foods in a variety of ways. Check out my blog post: “Let’s Get Salty” for all the great things that salt can do. But too much salt for some folks is a bad thing. Too much salt increases the risk of high blood pressure, heart disease, and stroke. However, just because you’re limiting your salt intake does not mean that you have to eat bland food.

In order to reduce our salt intake, we eliminated processed foods, which tended to be high in sodium, and we cooked almost entirely from scratch. This allowed us to have 100% control over all the ingredients.

We added more acid using citrus fruits and vinegars. Acids act a little like salt in that they help bring out the natural brightness of foods and work to meld flavors together.

We increased the size of our garden and used a lot more fresh vegetables and herbs. And, in some cases, we more than doubled the amount of herbs and spices any given recipe called for. We seasoned liberally and with authority. We learned to be fearless when it came to seasoning. Did we overdo it once in a while? Ya, we did, but we learned from each and every mistake how to make it better tasting despite the lack of salt.

Over time, we found that we didn’t miss salt quite so much because there were so many other flavors in our food. My grandmother who was diabetic loved coming to visit. She had to limit not only her salt intake but her sugar as well. Talk about there being no joy in Mudville. No salt and no sugar, and there just weren’t all of the sugar substitutes we have today.

But, being who he was, my dad stepped up to the challenge. When grandma came to visit, my dad would pull out every trick he knew, but he made sure she was still following her diet and eating healthy. She ate so well and the foods were so flavorful, I know her visits to our house brought so much joy to her in her final years.

That was just how I was raised. That was the life lesson my dad taught me. If you’re presented with a problem, you figure out a way to solve it. You improvise, adapt, and overcome.

So, whether it’s salt or sugar or dairy or gluten or something else, there is absolutely no reason why you can’t enjoy what you’re eating. Herbs and spices bring so much flavor that you won’t even miss what you can’t have.

If you like this blog and don’t want to miss a single post, subscribe to Chuck Wagoneer by clicking on the Follow Us button in the upper right corner and follow us on Facebook and Pinterest for the latest updates and more stuff!

Categories: Under the Lid | Tags: , , , , , , , , , , , | Leave a comment

Hot Stuff

Today is National Hot & Spicy Food Day. For those of you who like it hot, how do you roll? In my blog post “Some Like it Hot” we talk about cooking with hot peppers, but there are other ways to up the heat from a little to a LOT!

When folks think spicy food, there are a few cuisines that immediately come to mind. Thai food is known for its heat. Mexico, Latin, Central and South America are known for being spicy. Italy and India can also bring the heat.

Adding hot stuff to your cooking can help you enjoy more flavorful food, weight loss, and better health. Consuming spicy foods can do everything from reduce your risk of heart disease to help you shed that stubborn spare tire.

In our spice cupboard, we keep a bottle of crushed red pepper flakes. We also stock black pepper (of course), white pepper, cayenne pepper, paprika, chili powder, cumin, sriracha powder, and curry powder. These are just a few of the hot spices out there. These just happen to be the ones we keep in our spice cupboard.

Hot sauces are another way to go. Tabasco, Sriracha, and ghost pepper sauce are our go to hot sauces, depending on the level of heat and the flavor we want. Habanero hot sauce is another really popular and really spicy hot sauce. Cholula is a popular Mexican hot sauce that derives its great flavor from Arbol and Piquin peppers. Korea’s gochujang sauce is both hot and sweet and can be added to just about anything, not just Asian dishes. It’s a lot like Sriracha but has more flavor and depth.

Hot sauces are great because they can be mixed into a sauce for a milder heat or they can be poured on top for a more powerful punch.

I know I’ve only scratched the surface when it comes to hot stuff. Now that our daughter has upped her heat level and can tolerate spicier foods, our family has only just begun to fully explore the world of spicy foods. But I have to say that what we have explored so far has been very flavorful.

Your local large grocery store probably has whole sections devoted to hot sauces, spices, and other hot ingredients. Spicy foods are fun and bring so much flavor. If your heat tolerance is low, start small and slowly add more heat.

If you like this blog and don’t want to miss a single post, subscribe to Chuck Wagoneer by clicking on the Follow Us button in the upper right corner and follow us on Facebook and Pinterest for the latest updates and more stuff!

Categories: Under the Lid | Tags: , , , , , , , , , | Leave a comment

Peanut Butter and Jelly Backup

April 2 is National Peanut Butter and Jelly Day. When we camp, we always have a stash of PB&J makings in our food tote. When you’re camping with groups of youth, there is bound to be at least one picky eater in the bunch and even though they may have participated in the menu planning, now suddenly, at meal time, they don’t want what’s on the picnic table. When that happens, we usually point to the PB&J makings and say, “There you go.”

When we’re camping, we also plan our menu very tightly to minimize leftovers. If our campers are a little hungrier than we anticipated, someone may not be able to get their seconds or thirds that they want. Making a peanut butter and jelly sandwich is a great way to supplement and fill a hungrier belly.

Likewise, a peanut butter and jelly sandwich makes a great snack any time of the day, even midnight. The peanut butter provides a hit of protein, which will help you sleep warmer and better.

If your food tote includes some fresh fruit like bananas or apples, these can be either added to the sandwich or used in place of the jam. My daughter loves peanut butter and banana sandwiches which were also a favorite of Elvis Presley.

If the temperature is a little chilly, you can also slap your sandwich on a griddle and grill it. The peanut butter gets all melted and gooey and is almost decadent.

We usually pack a couple of small jars of jelly and/or jam in different flavors so folks have a choice and, if we have any peanut allergies in the group, we’ll also pack another kind of nut butter that they can have. There are lots of options out there or you can make your own nut butter using any combination of nuts and/or seeds.

So, when packing for your next camping trip make sure your food tote includes bread, nut butter(s), and jelly and/or jam. There is something about a PB&J that is both filling and comforting, and it is good any time of day or night as a meal supplement, meal replacement or a snack.

If you like this blog and don’t want to miss a single post, subscribe to Chuck Wagoneer by clicking on the Follow Us button in the upper right corner and follow us on Facebook and Pinterest for the latest updates and more stuff!

Categories: Under the Lid | Tags: , , , , , , , , , , , , | Leave a comment

On Top of Spaghetti

I’m not sure why, but spaghetti seems to be one of the most popular meals young scouts make on their first campout. I suspect one reason might be that mom or dad actually made the sauce at home and, in camp, all the scout has to do is warm it, cook the pasta, and combine the two.

Another reason might be that spaghetti can be pretty easy for a young chef if they are simply using a jarred sauce. Again, all they have to do is warm the sauce, cook the pasta, and combine. Meat is optional. But if they wanted a meat sauce, it’s not difficult to brown ground beef, sausage, turkey, or plant-based protein before they add the sauce or they could add a bag of Italian-style meatballs to their sauce. And, let’s admit it, meatballs are just fun! Who doesn’t like a plate of spaghetti and meatballs?!

The dish is actually named for the type of noodle used, which is long, thin, solid, cylindrical pasta. The sauce is a tomato sauce with meat and/or vegetables. A meat-based sauce is typically called a ragù and is a type of sauce, which should not be confused with the brand of jarred sauce found in most grocery stores.

The great thing about ragù sauces is that there are a million variations. Some are heavy, hearty and much more suited to cold, winter days. Others are light, herby and more suited to the warmer spring or autumn seasons. I can’t say that we eat a lot of spaghetti in the middle of summer although we have been known to toss together some vegetables and pasta with diced tomatoes, but it’s not what I would call a traditional spaghetti and ragù sauce.

If you don’t want to or have the time to make a sauce from scratch, jarred sauces are great to use as a base. I call them a base because they are middle of the road as far as flavor goes so they can appeal to a mass audience. If I am using a jarred sauce, I always tweak it and I encourage you to do the same.

Even though most jarred sauces have oregano and basil in them already, I always add more. I’ll add parsley, and maybe some onion powder and garlic powder. Sometimes I’ll add some red pepper flakes for a bit of heat. Other options include marjoram and chili powder.

Here’s what I do when I’m not following a recipe and I’m starting with a jarred sauce: I taste the sauce and then I start grabbing spice jars and sniffing and my nose tells me what to add. Let your nose and your taste buds guide you and you’ll end up with a great sauce.

So, if you’re looking for a quick and easy spaghetti sauce grab a jar and go for it. When you’ve got it to your liking, add some meatballs and pasta and serve it with a salad and some garlic bread. Your hungry campers will love it!

If you like this blog and don’t want to miss a single post, subscribe to Chuck Wagoneer by clicking on the Follow Us button in the upper right corner and follow us on Facebook and Pinterest for the latest updates and more stuff!

Categories: Main Dishes, Meals in 30 Min., Recipes, Under the Lid | Tags: , , , , , , , , , | Leave a comment

Let Them Eat Cake!

Just because we’re camping doesn’t mean we skip dessert. On the contrary, camp is the perfect place to roll out something decadent because we all know that what happens in camp stays in camp. But baking can be challenging (there is chemistry involved), and it can be even more challenging in a camp kitchen.

And, for the record, we love boxed cake mixes and canned frosting. If you add a can of pie filling and a can of soda pop, you’ve got the makings for a great dump cake.

In camp or at home, if you’re looking to kick it up a notch, nothing beats a cake made from scratch. You don’t need to be an experienced baker to turn out a great cake, but knowing the basics helps.

First, Read the Whole Recipe
Always read all the way through a recipe before you start. Butter has to be softened, nuts may need toasting and chopping, chocolate may need melting. Ingredients like eggs and milk should be brought to room temperature or the ambient temperature in camp. Scanning the recipe helps you get a game plan in your noggin.

Mise en Place
This is a fancy schmancy French term pronunced: mi zɑ̃ ˈplas, which means “putting in place” as in set up. Set out all ingredients and pull out any equipment you may need. Measure and mix your dry ingredients, measure your wet, chop whatever needs to be chopped, melt whatever needs to be melted, have your charcoal ready to light. Get everything ready to go.

This is a good habit to get into no matter what kind of cooking or baking you are doing. It ensures you don’t forget an ingredient and, once you start, you won’t be interrupted because something needs to be prepped.

Prep Your Oven
At home, remember to turn on your oven at least 10 to 15 minutes before baking so it has time to heat up. Likewise, in camp, make sure your box oven or Dutch oven is ready to go along with your charcoal in a chimney. Light your coals when you think you are about 15-20 minutes away from going “into the oven.”

Prep Your Pan
If the recipe requires it, grease and flour the cake pan before making the batter, so everything is ready to go when the batter is. To grease, use vegetable shortening on a paper towel. Vegetable shortening doesn’t darken as quickly as butter does, and it goes into crevices of fancy bundt pans, without puddling the way nonstick sprays do. To dust pans with flour, sprinkle them generously (for dark batter, use cocoa to avoid a white coating). Invert pan and tap lightly to remove excess.

Prep Your Dry
Measure all dry ingredients in metal or plastic measuring cups. I keep a complete set of metal measuring cups in my chuckbox. Always lightly spoon in flour and confectioners’ sugar, taking care not to pack it down or tap the cup. Fill to overflowing; level cup with a knife or straight-edge spatula. For packed brown sugar, press firmly into the cup.

Prep Your Wet
Measure liquids in a glass or plastic measuring cup specifically for measuring liquids. I like to place the measuring cup on the kitchen counter or the top of my chuckbox because it’s level (I always level my chuckbox when setting up my camp kitchen). Setting the measuring cup on top of my chuckbox also puts the measuring cup at eye level so I can read the mark accurately without stooping (I do enough stooping in camp tending to my charcoal and ovens). And, pour in the liquid all the way to the mark.

Use Real Measuring Spoons
The spoons in your flatware set are not standard cooking measurements. I keep a couple sets of metal measuring spoons in my chuckbox. That way, if I’m measuring something wet or something dry, I probably have a clean measuring spoon in the size that I need. And, yes, I’ve watched young chefs measure using the spoon from their mess kit.

Rack/Pan Position
At home, place baking pan on the middle oven rack, at least 1 inch from sides of oven, so heat can circulate. You’ll want to ensure good heat circulation in a box oven in camp. If you are baking in a Dutch oven, place a trivet in the Dutch oven to rest your cake pan on (if you’re not cooking directly in the oven). After minimum baking time, touch center of cake lightly with your fingertip. If no imprint remains, or if a wooden toothpick inserted in center of cake comes out clean, cake is done. In camp, I usually recruit a helper who either lifts the box oven or the Dutch oven lid so I can quickly test and then they quickly set it back down. Every time you lift the box or the lid, there is huge heat loss so you want to work as quickly as possible to retain as much heat as possible in case the cake needs more time.

Cool Down Time
Allow cake to cool in pan 10 to 15 minutes on a wire rack. If you leave it in the pan too long, it will steam and get soggy. Then run a knife around edge and invert cake onto a wire rack to finish cooling, about 2 hours for thick cake pans, bundt pans, and fluted shapes. Frost, glaze, or dust with confectioners’ sugar.

Now, you have a cake that should win you some Ooos and Aaahs. We like cake.

If you like this blog and don’t want to miss a single post, subscribe to Chuck Wagoneer by clicking on the Follow Us button in the upper right corner and follow us on Facebook and Pinterest for the latest updates and more stuff!

Categories: Under the Lid | Tags: , , , , , , , , , , | Leave a comment

Some Like it Hot

Recently, I accepted a challenge from my son to try his ghost pepper sauce. I survived. The label on the bottle came with a warning: “Use this product one drop at a time. Keep away from eyes, pets, and children.”

I’m not ashamed to admit, I was a little worried. I have a pretty good heat tolerance but it no where comes near my son’s. When we go out to eat, he always orders the hottest thing on the menu.

For dinner that night, we made our pizza pasta skillet, which already has a little heat to it. I separated about two bites worth on my plate, added 2 whole drops of ghost pepper sauce, mixed it in and then ate it. The heat built quickly and I got the hiccups, much to my family’s amusement. My eyes watered just a bit and my sinuses opened right up. I had a glass of milk handy and that helped put out the fire.

Dairy products are the most effective at getting rid of the heat because the capsaicin is more easily absorbed by the fats in dairy. So, when the heat is too much for you, reach for a glass of milk or add a dollop of sour cream to tone it down.

Over all, it wasn’t a bad experience. I might try it again in something else. My son recommended adding it to beef ramen. The ghost pepper sauce has a nice flavor although I prefer the taste of Sriracha and Tabasco, which are made from jalapeños and tabasco chili peppers, respectively.

How Hot is Hot?

Ghost Peppers currently rank #7 on the Skoville Heat Unit (SHU) scale coming in at 1,041,427 SHU. SHU is a way of quantifying how spicy a pepper is by measuring the concentration of capsaicinoids. Capsaicin is the chemical responsible for the spicy sensation within a pepper.

The Carolina Reaper is the reigning champion and has held the #1 spot since 2013 with 2,200,000 SHU, making it 200x hotter than a Jalapeño. It currently holds the Guinness World Record for being the hottest chili pepper.

Another popular hot pepper is the Habanero. Once considered King, it now barely makes the Top 10 List coming in at #10 with 500,000 SHU. It has great flavor and still qualifies as extreme heat.

Down in the more manageable range is the Cayenne Pepper (30,000-50,000 SHU) and the Jalapeño (2,500-8,000 SHU), which is probably what the majority of us eat when we’re looking for something spicy.

For folks looking for flavor with a very mild heat, there’s the Poblano (1,000-1,500 SHU) and the Bell Pepper (0-100 SHU).

Chili peppers are actually fruits, not vegetables, and they are one of earliest known domesticated crops. Typically, the smaller the pepper, the hotter it usually is. Most chili peppers grow in South America, Central America, the American Southwest, and Southeast Asia.

Benefits of Eating Hot Peppers

Eating hot peppers can increase your metabolism and reduce your appetite, which makes it good for weight loss.

Believe it or not, eating hot peppers actually benefits the digestive tract. The capsaicin in peppers act as an anti-irritant. For example, pepper powder provides trace amounts of anti-oxidants and other chemicals to aid digestive issues such as, healing an upset stomach, reducing intestinal gas, curing diarrhea and acting as a natural remedy for cramps. It does this by reducing the acidity in the digestive tract that causes ulcers. It also helps produce saliva and stimulates gastric juices aiding digestion.

Hot peppers promote a healthy heart by aiding the circulatory system and help prevent heart disease by lowering blood serum cholesterol and reducing lipid deposits, which reverses excessive blood clotting. It also dilates the blood vessels to aid in blood flow.

Hot peppers can also mitigate migraines, relieve joint pain, ease psoriasis, and reduce our cancer risk. They support the immune system and can help you fight off the flu, colds, and fungal infections. It even prevents bad breath and allergies.

I think I need to eat more hot peppers! How about you?!

Safety Warnings

When cooking with peppers of any kind remember that the majority of the heat is in the seeds and membranes. Removing those can reduce the heat. Also, when handling hot peppers, always have eye protection and glove up. You don’t want to handle a hot pepper and then touch your face. After handling them, remove your gloves and wash your hands just as an extra precaution.

Upping Your Heat Game

If you want to increase your heat tolerance, just step it up slowly. My daughter literally started with 1 drop of sriracha in her ramen. Now, she can handle all kinds of spicy foods and when it gets too hot, she reaches for the milk and/or the sour cream. She has become fearless when it comes to spicy food and we couldn’t be more proud of her for stepping outside her comfort zone. My son is happy also because we can cook with more spiciness and we don’t have to tone it back for her.

Peppers Pack a Flavor Punch

In addition to the heat, peppers bring a lot to the party in terms of flavor, so don’t be afraid to use them. Dice a whole pepper or add a splash of sriracha or Tabasco or sprinkle on sriracha powder or dried red pepper flakes. You have lots of options. Be fearless!

If you like this blog and don’t want to miss a single post, subscribe to Chuck Wagoneer by clicking on the Follow Us button in the upper right corner and follow us on Facebook and Pinterest for the latest updates and more stuff!

Categories: Under the Lid | Tags: , , , , , , , , , , , , , , | 1 Comment

Let’s Get Salty

Salt is one of the oldest spices used and is a key component to humans, animals, and plants. Its flavor is unique and versatile. Salt has been a staple throughout time. Enhancing almost every dish, salt is added to breads, meats, fruits and vegetables, sauces, and even desserts. Yes, you read correctly. A good dessert probably has at least a pinch of salt.

In addition to being a rock star when it comes to flavor enhancement, salt aids foods in a variety of ways like:

Preservation
Salt helps protect against micro-organisms, bacteria through dehydration, and preventing growth of bacteria, which slows or prevents spoilage.

Texture
In bread making, salt allows the dough to rise by helping the gluten hold more water and carbon dioxide.  In meats it improves tenderness and in cheeses it aids in consistency of the cheese and the hardness of the rind.

Binder
In processed meats, salt helps retain water which reduces the loss of meat when cooking.

Color
In ham, bacon, and other processed meats, salt helps obtain the desired color. It also helps create a golden crust for breads.

Fermentation Control
Salt slows and controls the fermentation process in pickling, cheese, sauerkraut, and sausage production.

Let’s Get Salty
As you’re cooking, don’t be afraid to add a little bit of salt to everything; however, if you’re new to seasoning, start with small increments, tasting as you go, and work your way up. If you accidentally add too much, just add more of the other ingredients to balance out the salt. It could be as simple as adding more water to a soup or more butter or milk to a sauce.

Pasta water can be salted liberally, about 1 tablespoon of salt for every 4 quarts of water. Meat needs a generous amount of salt as well, about 1 teaspoon for every pound of meat.

Salt all the separate components of a dish. For example, when I’m making spaghetti, I salt the pasta water, I salt the ground beef as I’m browning it, and I salt the sauce. But again, if you’re new to seasoning, start light and build as you go. In no time at all you’ll be seasoning with authority, and everything will taste that much better.

If you like this blog and don’t want to miss a single post, subscribe to Chuck Wagoneer by clicking on the Follow Us button in the upper right corner and follow us on Facebook and Pinterest for the latest updates and more stuff!

Categories: Under the Lid | Tags: , , , , , , , , , | Leave a comment

Add an Egg to Your Ramen Bowl

We’ve been on a ramen kick lately. We love to make ramen noodle bowls with whatever we have in the house. Making ramen bowls in camp takes a little more planning and prep because you can’t just open the fridge and see what floats your boat.

For ideas on how to up your ramen game, please see my blog posts, “Ramen Remakes” and “Make Your Own Meatballs.”

In true Asian fashion, my daughter loves to add soft boiled eggs to her ramen bowls. The picture above is hers. Eggs are cheap, delicious, a good source of protein, and in most cases, can be cooked directly in the same pot with the noodles or the broth. Here are a few simple ways to do it.

Hard-Boiled Eggs
This is the easiest way to do it. Start with eggs in a pot of cold water. I add a little salt and baking soda (not sure of the science behind this, but it seems to help them peel better). On high heat, bring water to a boil, turn off the heat or turn it down really low and let the eggs cook for about 10 minutes. Have a bowl of ice water standing by and, using a pair of tongs, remove the eggs from the hot water and plunge them into the ice bath. Let them sit in the ice bath for about 5 minutes. Remove from the ice bath, peel, slice, and add to your ramen, or store in your refrigerator.

Soft-Boiled Eggs
These are a little trickier, because the timing has to be a little more precise. Gently drop the eggs into the pot after it’s come to a full boil, start a timer, and pull them out after 3 minutes for super-soft, or 5 for a fully-set white and semi-liquid yolk. I like to cut the eggs open and stir the yolk into the broth as I eat it. My daughter let’s her eggs go about 7 minutes because she wants a more solid yolk.

Egg-Drop
Lightly beat an egg in a small bowl. Once your noodles are cooked, swirl the noodles and hot broth gently around the pot. While the broth is moving, slowly drizzle in the beaten egg. It will create little wispy ribbons of egg that float in the broth and coat the noodles.

Poached Eggs
If you don’t mind an irregular shaped egg, this is an easy way to add an egg to your soup. Cook the noodles until they’ve just started to separate from each other (about halfway through their total cooking time), remove the pot from the heat, crack a raw egg into the center, place the lid on the pot, and let it sit for 3-5 minutes until both the noodles and eggs are cooked. Experiment until you get the egg poached just to your liking.

Fried Eggs
If all of the above sounds too complicated, you could just a fry an egg in a separate pan and lay it on top of your ramen, but it will require dirtying a second pan and you’ll need a second burner. We fry eggs in a small skillet, on medium-low heat, with just a little butter. I put a lid a on the skillet and let the egg cook 1-3 minutes depending on how hot my pan is (sometimes the camp stove is little twitchy). I give the egg a flip and let it go about 30 seconds more and it’s a perfect over easy to over medium egg.

So, the next time you make a ramen bowl, at home or in camp, add an egg to it. It’s yummy!

If you like this blog and don’t want to miss a single post, subscribe to Chuck Wagoneer by clicking on the Follow Us button in the upper right corner and follow us on Facebook and Pinterest for the latest updates and more stuff!

Categories: Meals in 30 Min., Under the Lid | Tags: , , , , , , , , | Leave a comment

Make Your Own Meatballs

Meatballs are fun and always seem a little fancy. Whether they are classing up a simple meat sauce, serving as a tasty appetizer, or floating in a savory soup like the Miso Noodle Soup I posted last week, meatballs simultaneously add a bit of playfulness and elegance to a dish.

Making your own meatballs is easy and fun, and the flavor possibilities are only limited by your imagination. Here is a mix and match guide to making your own meatballs. And, if you’re vegan or vegetarian, you don’t have to miss out on the fun. You, too, can enjoy a little meatball madness.

You could omit or substitute the egg and/or breadcrumbs. They help hold the meatballs together, but they are not required. It will depend on your combination of ingredients. For example, the meatballs for the Miso Noodle Soup are made with ground pork, honey, sriracha, salt, and pepper, and they hold together very well.

Ingredients for a Basic Meatball
1 pound protein of your choice, ground
1 teaspoon salt
½ teaspoon black pepper
1 egg
¼ cup breadcrumbs

Proteins
Choose a single protein or a combination like beef and lamb or beef and pork (1 pound total): beef, turkey, pork, chicken, lamb, or 2 (15-ounce) cans beans, drained, rinsed, and mashed.

Seasonings
Add at least 2 (1 tablespoon total): oregano, cumin, paprika, cinnamon, red pepper flakes, soy sauce, honey, sriracha, chili powder, taco seasoning, grated parmesan, or grated cheddar.

Vegetables and Herbs
Add at least 2 (3/4 cup total): grated onion, grated carrot, minced garlic, citrus zest, chopped cilantro, chopped parsley, chopped rosemary, or chopped thyme.

Prep
In a bowl, mash all the ingredients together. I like to glove up and use my hands, which are the two best tools in the kitchen. (For the beans, if you use a food processor to mash them, be careful not to over process or they will fall apart).

Divide the meatball mix into 16 blobs (technical term) and form/roll each blob into a round little ball.

Arrange meatballs on a baking sheet and bake in a 400°F oven for 20 minutes or until golden brown and cooked through, or they can be (gently) dropped directly into a simmering soup or sauce and cooked 5-10 minutes or until done.

Makes 16, nicely sized, meatballs.

Now it’s time to experiment and try different combinations. Have some fun and make some magic, I mean, meatballs!

If you like this blog and don’t want to miss a single post, subscribe to Chuck Wagoneer by clicking on the Follow Us button in the upper right corner and follow us on Facebook and Pinterest for the latest updates and more stuff!

Categories: Main Dishes, Make & Take, Snacks, Under the Lid | Tags: , , , , , , , , , | 1 Comment

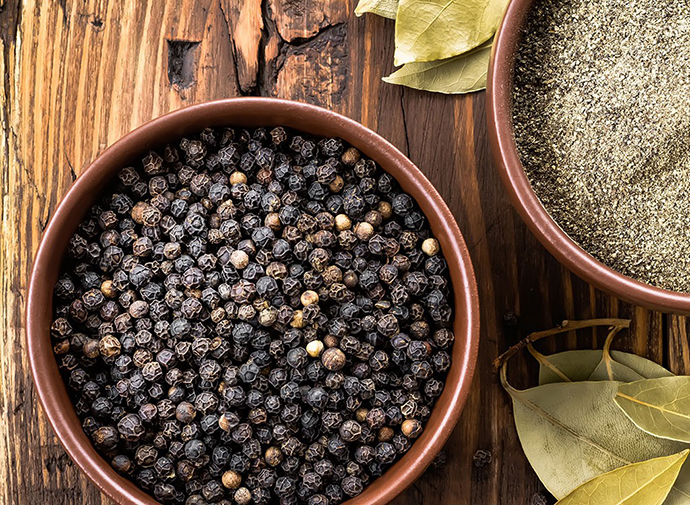
Black Pepper Enhances Flavor and Health

In the world of spices, black pepper is considered royalty. Often referred to as the “King of Spices” a pinch of black pepper is added to just about every savory dish.  Like salt, black pepper is a flavor enhancer, adding a depth of flavor and providing a multitude of health benefits.

Black pepper is the fruit of the black pepper plant from the Piperaceae family and is used as a spice and medicine. The chemical piperine, present in black pepper, causes the spiciness. It is native to India. Since ancient times, black pepper is one of the most widely-traded spices in the world. It is not a seasonal plant and is, therefore, available throughout the year. When dried, this plant-derived spice is referred to as a peppercorn. Because of its antibacterial properties, pepper is used to preserve food. Black pepper is also a very good anti-inflammatory agent.

Black pepper is a rich source of minerals like manganese, copper, magnesium, calcium, phosphorus, iron, potassium, and vitamins like riboflavin, vitamin C, K, and B6. Black pepper has a high content of dietary fiber and has a moderate amount of protein and carbohydrates.

Black Pepper is a Healthy Ingredient

Black pepper stimulates the taste buds and stimulates the stomach to increase hydrochloric acid secretion. Hydrochloric acid is necessary for the digestion of proteins and other food components in the stomach. When the body’s production of hydrochloric acid is insufficient, food may sit in the stomach for an extended period of time, leading to heartburn or indigestion, or it may pass into the intestines, where it can be used as a food source for unfriendly gut bacteria, whose activities produce gas, irritation, and/or diarrhea or constipation. Pepper also helps prevent the formation of intestinal gas.

Black pepper improves weight loss by assisting with the breakdown of fat cells.

Black pepper provides relief from sinusitis and nasal congestion. It has an expectorant property that helps break up mucus and phlegm in the respiratory tract.

Because it is antibacterial, black pepper helps fight against infections and insect bites.

Black pepper helps keep your arteries clean by acting in a similar way to fiber and scraping excess cholesterol from the walls, helping reduce atherosclerosis, the condition highly responsible for heart attack and stroke.

Antioxidants in black pepper can prevent or repair the damage caused by free radicals and thus help prevent cancer, cardiovascular diseases, and liver problems. Free radicals are by-products of cellular metabolism that attack healthy cells and cause their DNA to mutate into cancerous cells. Antioxidants neutralize these harmful compounds and protect your system from many conditions and even symptoms of premature aging like wrinkles, age spots, macular degeneration, and memory loss.

Using Black Pepper

For cooking and for adding at the table, it’s better to buy whole peppercorns, not the powdered black pepper. Look for peppercorns that are compact, round, heavy, and wholesome. Peppercorns can be stored for months in a dry air-tight container at room temperature, in a dry and dark place. And you can keep the ground black pepper in the refrigerator for a longer shelf life.

For the best flavor, add pepper that you have freshly ground in a mill at the end of the cooking process. Since it loses its flavor and aroma if cooked for too long, adding it near the end will help to preserve its flavor.  Here are a few more  ideas:

  • Coat beef and pork with crushed peppercorns before cooking. For two of our favorite peppercorn recipes (and they actually go together), please read my blog posts: “Peppercorn Crusted Pork Loin Roast” and “Zesty Peppery Parmesan Aioli.”
  • As the pungent taste of black pepper is a natural complement to the deep, berry-like flavor of venison, use it to flavor this meat when preparing venison steaks or venison stews.
  • Keep a pepper mill on your dining table so that you can add its intense spark to all the food on your plate.
  • Olive oil, lemon juice, salt and cracked pepper make a simple, quick and delicious salad dressing.

Adding a pinch of black pepper to every meal helps to improve both taste and digestion. It also improves your overall health and well-being. So, use more black pepper in your cooking and at the picnic table!

If you like this blog and don’t want to miss a single post, subscribe to Chuck Wagoneer by clicking on the Follow Us button in the upper right corner and follow us on Facebook and Pinterest for the latest updates and more stuff!

Categories: Under the Lid | Tags: , , , , , | 1 Comment

Create a free website or blog at WordPress.com.