Cooking Outdoors

New Year’s Resolutions

2021 has finally arrived but, at the moment, it doesn’t feel a whole lot better than 2020. Nevertheless, there are things we all can do to try and make 2021 a better year and it all starts with our new year resolutions.

One resolution we all should make is to get outside more often and by that I mean every day. No matter what the weather is like, get outside, take a short or a long walk, breathe in fresh air, soak up some sun (and vitamin D), listen to the birds, stop and smell a flower, wave to your neighbor. The important thing is to spend time outside in some kind of activity be it walking, running, gardening, etc. It doesn’t matter what you do, just do it, outside.

Speaking of activity, increase yours. Find ways to be more active. If you don’t workout, start. If you do workout, up your game. If you have health issues, talk to your doctor about what you could do. Make a commitment to work toward being your best. We all love to camp and cook, but it can be physically demanding so we need to make sure we stay physically fit so we can continue to do what we love to do.

Up your outdoor cooking game. Have you ever made biscuits from scratch? If not, you should, they are amazing and they are not as hard as you think they are. For a good biscuit recipe, please read my blog post: “Best Buttermilk Biscuits.” Have you have ever made bread in a Dutch oven? Have you ever made your own meatballs? Have you ever made an Asian stir fry? I have a few that we love to make: Beef and Broccoli and Kung Pao Chicken. Check ‘em out.

Have you ever baked something in a box oven? Do you have a Dutch oven that you’ve never really used? Make a resolution to master it or some other culinary technique.

Is there some outdoor camping skill you could improve upon? Do you suck at fire building? Can you tie a taut-line hitch? A clove hitch? Maybe it’s time you learned.

 So, sit down for a moment or go for a walk and figure out what kinds of resolutions (goals) you can set for 2021, and make sure they include the outdoors and upping your outdoor cooking skills. Before you know it, camping season will be here. Will you be ready?

If you like this blog and don’t want to miss a single post, subscribe to Chuck Wagoneer by clicking on the Follow Us button in the upper right corner and follow us on Facebook and Pinterest for the latest updates and more stuff!

Categories: Cooking Outdoors, Health & Safety | Tags: , , , , , , | 2 Comments

Quality Coolers are a Must Have

When I’m teaching outdoor cooking skills, I often get asked what are the essential items to get started? One of the must have pieces of camping equipment are a couple of good coolers. Cold foods should be kept below 40°F. So, unless you regularly camp in temperatures below 40°F, you need to have good coolers. And the higher the temperatures, the better the coolers need to be.

Coolers are one place where you want to spend the money and opt for the highest quality you can afford. You want rugged, hard-shell, well insulated coolers with tight seals. Lockable ones are even better. Trust me, most raccoons are pretty smart. You want coolers that will keep your foods cold at least 4-6 days. This will get you easily through a long weekend. If you like to take longer trips, there are more options.

I advocate for multiple, smaller coolers as opposed to one big cooler. Smaller coolers are easier to lift and pack into your vehicle. Packing the vehicle is always a game of Tetris, isn’t it?

Smaller coolers allow you to separate your foods by type, i.e., all your proteins in one, all your fresh produce in another, all your cold beverages in another, etc., or you can separate by meal so that the Sunday morning breakfast cooler doesn’t need to ever be opened until Sunday morning.

The best brands on the market today include Yeti, Orca, RTIC, Engel, Xspec, OtterBox, Cabela, Igloo, and Coleman. There are more brands but the ones I mentioned consistently get high marks from hard core campers. Each of these lines have multiple models with varying features to fit your needs. Figure out how and where you like to camp and what’s important to you.

Even if you’re just a weekend camper, go for something that will keep foods cold (below 40°F) at least 4-6 days. This will ensure that even on a long weekend, your foods will still be cold by the end of the trip and the return back home where anything that did not get eaten can be safely returned to the refrigerator.

If you live in bear country, you might want to check out coolers with IGBC certification. Yes, that’s a thing. A certification from the Interagency Grizzly Bear Committee verifies that the product in question has been tested by said committee and meets minimum standards for design and structural standards that are considered “bear-resistant” by a team of grizzly bear experts. The IGBC specifically states that this does not mean the product in question can’t be opened or destroyed by a bear, nor does it mean the product is leakproof. With that said, even the minimum construction standards required to deter a hungry 900 lb grizzly lend a lot of credibility to the durability of a product.

Do your research. Quality coolers are a good investment and, once you’ve made your purchase, treat your cooler as just that: an investment. Store it in a safe place, clean it out after every trip, take good care of it, and it will last a long, long time. A quality cooler will keep your foods safe and cold, and that includes your beer because after a long hike who wants a warm beer on a hot day?!

If you like this blog and don’t want to miss a single post, subscribe to Chuck Wagoneer by clicking on the Follow Us button in the upper right corner and follow us on Facebook and Pinterest for the latest updates and more stuff!

Categories: Cooking Outdoors | Tags: , , , , , | Leave a comment

Who Doesn’t Love Hot Cocoa?

Unless you don’t like chocolate (and who doesn’t?!), most everyone loves a hot cup of cocoa. Kids love it. Adults love it. And, you can dress it up or down, make it fancy or keep it simple.

Saturday, December 12, is National Cocoa Day and no camping trip would be complete without a good supply of hot cocoa. Hot cocoa is a must have for cold, winter weather, but it’s also great on a chilly spring morning or a crisp fall evening. It’s even a good way to start the day in the middle of July.

Hot cocoa can be made from scratch or you can grab a packet of the instant stuff and just add hot water. If you’re making cocoa from scratch, remember to add just a pinch of salt to enhance the flavor.

So, how do you spice up or, for the adults, spike your hot cocoa?

Marshmallows and Whipped Cream have to top the list. They are the classic toppings. If you are a marshmallow fan, they come in flavors and multiple sizes for more options.

Make a s’mores cocoa with Marshmallows and crushed Graham Crackers (pictured).

Melt a crushed up Candy Cane or an Andes Mint in your hot cocoa for a minty twist. My daughter has recently started doing this and loves it.

Stir in some Caramel sauce.

Add a dash of Cinnamon for a Latin twist.

Add some Almond Extract or Vanilla Extract.

Mash up a bit of Banana. It might make for some chunks and floaties but you can spoon those out and eat them!

How about using Coconut Milk in place of regular milk?

Melt some Peanut Butter in your hot cocoa or stir in some PB2 powdered peanut butter.

Add a flavored creamer, like Hazelnut or melt some Nutella in your hot cocoa.

Melt in some White Chocolate or, if you make your hot cocoa from scratch, use White Chocolate or Dark Chocolate instead of regular chocolate.

For the adults in the crowd, try adding a shot of Amaretto or Bailey’s Irish Cream or Kahlua or Crème de Cacao to your hot cocoa. Makes a perfect nite cap at the evening campfire.

In addition to the Crème de Cacao, add some Peppermint Schnapps and Crème de Menthe for a peppermint patty style cocoa.

For an almond joy, use Coconut Milk and add Crème de Cacao and Amaretto.

Grand Marnier makes for super-sophisticated, orange and chocolate cocoa.

We hope you’ll give some of these a try and have some fun experimenting. And, feel free to mix and match. We can’t wait to see what you come up with!

If you like this blog and don’t want to miss a single post, subscribe to Chuck Wagoneer by clicking on the Follow Us button in the upper right corner and follow us on Facebook and Pinterest for the latest updates and more stuff!

Categories: Beverages, Cooking Outdoors | Tags: , , , , , , | 5 Comments

Setting the Perfect Picnic Table

If you camp as much as I do, paper plates and plastic silverware can get really expensive, and they also create a lot of trash. While paper plates could be burned in the fire pit, the rest is just filling up the garbage bag, and there are a few camping spots where we need to pack out our trash.

All that paper and plastic is just not good for the environment and that’s something we care about and want to protect so future generations can camp and enjoy the outdoors. It’s also a good example to set for kids and show them that the world is not disposable.

For eating and drinking, we use enamelware and metal silverware. Ceramic and glass, of course, are too fragile and won’t stand up to the rugged camp environment. Plastic is lightweight, but you need to be careful with it around fire and hot coals. I have seen many a plate melted because it was set too close to the fire. For that very reason, I prefer the enamelware. It’s super durable, easy to clean, and the speckled finish captures that classic camping look that I grew up with.

For hot or cold beverages, everyone has an insulated mug or they use one of the enamelware cups. We wash dishes after every meal and hang everything in mesh laundry bags to air dry. If you don’t let dishes sit and you clean up right away using soap and hot water, it’s really not that hard, and if everyone pitches in, it goes really fast. For more information on washing dishes in camp, read my blog post: “Good Dish Washing in Camp.”

When I’m cooking, if I need a little butter melted, I’ll grab a cup and set it near the fire or on the stove near the burner to melt the butter. If my coffee gets cold, I’ll do the same thing and it warms in no time. If it’s cold outside, I can load plates into a Dutch oven and add just a few coals to the top and bottom of the oven and warm them before serving.

Enamelware comes in many colors so you have choices if you want to coordinate with an RV décor, other serving items, or if you just want to set that Sunset Magazine table.

Currently, I have a red set, a blue set, and a green set. A friend suggested I get a white set for photographing my food, so I’m on the hunt for a nice white, speckled set to add to my collection.

However you set your picnic table, be sure you’re doing it in a way that is easy on the environment. It might mean a little more work when cleaning up, but it’s worth it if it saves the outdoors for future generations. And, for that future generation, it’s a teachable moment about pitching in, helping out, and working together to get a job done quickly and easily. And the faster we get cleaned up, the faster we can move on to a campfire and s’mores!

If you like this blog and don’t want to miss a single post, subscribe to Chuck Wagoneer by clicking on the Follow Us button in the upper right corner and follow us on Facebook and Pinterest for the latest updates and more stuff!

Categories: Cooking Outdoors | Tags: , , , , , , , , , | Leave a comment

Cooking with Propane

When I’m teaching outdoor cooking skills, I’m often asked what are the essential items to get started? Whether you are backpacking or car camping, one must-have is a stove.

Backpacking Stoves

A backpacker’s stove of choice will be a one-burner lightweight, compact stove that will predominantly be used for boiling water that will then be used to rehydrate ingredients to make a beverage or a meal.

Canister stoves are the most common and convenient type of stove, and they’re the easiest to use. Liquid fuel stoves are the most efficient for high altitude or below freezing temperatures. Wood stoves are nice because you don’t have to carry fuel, but they don’t work for trips above the tree line or in most desert environments. Solid fuel stoves and alcohol stoves are generally pretty budget-friendly and they’re ultra light, but you can’t control the flame, they yield slow boil times, and they’re not great in wind. Do your research and factor in where you like to backpack and choose according to your budget and need.

If you’re looking for an all around 3-season option, canister stoves are light, compact, easy to use, and fast. With canister stoves there’s no priming, pumping, or maintenance of any kind. Simply screw the canister into your stove and light the burner for a quick meal. In addition, isobutane canisters are more efficient than esbit and alcohol, and they’re very easy to find in outdoor stores and online.

Car Camping Stoves

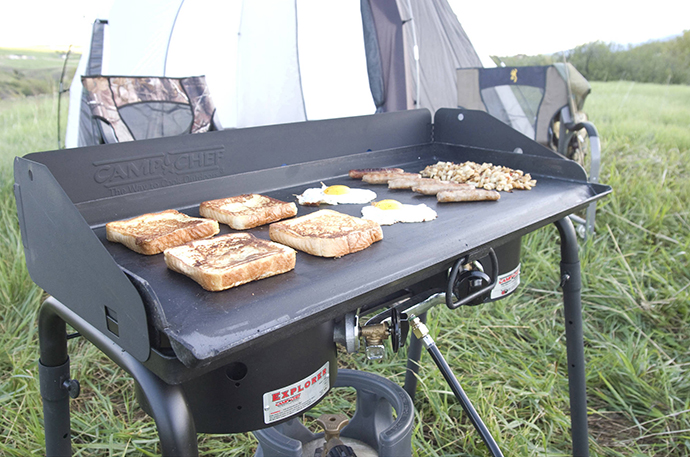
For car campers, the classic compact two-burner stove will get you started. It will heat water and make a pot of coffee. You can cook a pot of pasta or rice. You can make a pot of soup, stew, or chili. You can make breakfast or dinner in a skillet or on a griddle. If you have a gas stove at home, your camp stove will be very familiar to you. Camp stoves are usually allowed everywhere, even during a fire ban (check the regulations for where you will be camping before you go, just to be sure).

For fuel, you can use the 1-pound disposable propane fuel cylinder or you can hook up a larger propane tank. I don’t recommend stoves with a push-button igniter. Too often, I’ve seen them wear out and start failing. I just carry a long-nosed lighter and waterproof matches, and light my burner the old fashioned way.

Your average compact 2 burner stove is going to have about 10,000 BTUs per burner, which is great; however, if you want more BTUs for your buck and want something more heavy duty, you could consider a large burner option. These are a little more spendy, but you get more power (30,000+ BTUs per burner), and because the burners are larger, you can use larger pots and griddles, which comes in handy for group camping. These are typically free-standing but still highly portable and you will need to connect them to a larger propane tank. Depending on your budget and needs, you could opt for 1-3 burners, and they also have all kinds of accessories, including griddles, BBQ boxes, and ovens. Please read my blog post: “Product Review: Italia Artisan Pizza Oven.”

If you’re cooking for a crowd or just wanting more BTUs for hotter, faster cooking, a large burner cooking system is the way to go, and the available accessories give you lots of cooking options. However, if you’re just starting out and/or wanting something smaller and more compact, there are lots of good options out there.

If you like this blog and don’t want to miss a single post, subscribe to Chuck Wagoneer by clicking on the Follow Us button in the upper right corner and follow us on Facebook and Pinterest for the latest updates and more stuff!

Categories: Cooking Outdoors | Tags: , , , , , , , , | Leave a comment

Is Your Camp Kitchen Organized?

In our camp kitchens, can we readily find what we need? Are we always digging through totes to find that one tool that always seems to be at the bottom of the tote? Are we risking slicing our hands on something sharp as we dig through our totes?

If folks are helping us in our camp kitchen can they find what they need? Are things organized in a logical way that folks can easily figure out? Or are you constantly getting peppered with “Where’s this?” and “Where can I find that?”

Whether our camp kitchen is organized into a chuck box or into totes and containers, it needs to be organized. Having places for things helps you to find them easier and it prevents them from becoming damaged.

If you are using totes, a good way to do it is to organize by purpose. Your home kitchen cupboards are probably organized this way. Dishes are together and probably near your glassware. You probably have a spice cupboard. Pots and pans are all together as are all your baking dishes. Same thing is probably true for your pantry. Canned goods are together, baking supplies are together. Dry goods like pasta and rice are together.

Why do we do this? So it’s easier to find what we need. It’s logical and it just makes sense. You could probably step into my pantry, take a quick assessment and easily find you need you need. Looking for baking powder? It’s probably on the shelf with the baking soda, flour, and sugar. Our camping totes should be organized similarly.

I have a chuck box that holds most of my cooking equipment. It has my camp stove, cutting boards, griddle, coffee pot, pots, dishwashing tubs, small and large utensils, dishes, and more. For a complete list, see my blog post, “Think Inside the Box Part 1-Your Camp Kitchen.” I love my chuck box, but it is very heavy. It takes two of us to move it.

Totes, on the other hand, can be smaller, lighter, easier to stack, and easier to move. If you’re going the tote route, choose heavy duty ones. They’re going to take a lot of abuse and the thinner plastic ones just won’t survive. Totes designed for tools will often have a removable tray on top that can be used for small items. If you keep all your totes the same size and type, they will stack efficiently for storage and transporting. If you camp where there there tends to be critters, especially raccoons, you may want to consider having totes that are lockable.

Inside your large totes, use smaller containers to organize small utensils so they don’t get lost or damaged. A plastic bread keeper or a plastic shoe box works well for holding knives, large utensils, etc.

You could have a small tote that is just for dishwashing that has your wash tubs, collapsible drying rack, mesh bags, clothesline, dishwashing soap, bleach, scrubbies, and cheesecloth.

I have a tote that is just for my Dutch oven cooking. It has my chimneys, lid lifters, feed pans and stands. I made the mistake of using a thin plastic tote and now a couple of the corners are cracked and held together with duct tape. I need to replace it.

All your totes and coolers should be clearly labeled. You could even print a complete inventory list for each box, laminate it, and tape it to the box. It makes it easy to find stuff and, after cleanup, it ensures everything is put back in the correct tote for easy finding the next time.

Food Totes

I try to organize my food totes one of two ways. They are either organized by type (like my home pantry) or by meal. If it’s a longer camping trip and we’ll be doing more scratch cooking then I will organize my food totes like my home pantry with baking supplies together, chips and snacks together, etc.

However you organize your camp kitchen equipment and food, the important thing is that it’s organized. You and all your sous chefs will be way more relaxed in the kitchen if you all can quickly and easily find what you need. This way, you can focus on creating all those good eats!

If you like this blog and don’t want to miss a single post, subscribe to Chuck Wagoneer by clicking on the Follow Us button in the upper right corner and follow us on Facebook and Pinterest for the latest updates and more stuff!
Categories: Cooking Outdoors | Tags: , , , , , , , , | Leave a comment

Is Your Camp Kitchen Covered?

The bulk of my camping experience has been in the Northwest where you just accept the fact that it will probably rain at some point during your campout. So, in addition to having a good quality tent, you also need a good canopy tent for your camp kitchen. These are often referred to as easy-ups or pop-ups and they offer protection from both sun and rain.

A canopy tent also gives you a place to hang a lightweight lantern to illuminate your kitchen in the dark. Some folks string white outdoor Christmas lights and run them off of a battery to illuminate their camp kitchens in the evening. I like to string a couple of clothes lines to hang wash cloths and dish towels to dry. Just remember to pull them in before you go to bed so they don’t pick up condensation overnight; otherwise, you’ll wake up to damp towels.

If you are camping in a national or state park group site, they usually have a covered shelter with a concrete floor where the picnic tables are. They are usually large enough to accommodate your kitchen equipment and depending on the size of your group, you may be able to designate one of the picnic tables as kitchen workspace. Some group shelters have built in cabinets with countertops, maybe a sink with running water, electricity, and maybe a fireplace. You’ll be camping in style if you have one of these.

Most of the time, you’ll probably be in a regular campground campsite, which will not likely have any kind of permanent shelter.

Location, Location, Location
Most campsites have a picnic table and a grill box. If you can, you’ll want to position your kitchen canopy tent near both of these. You’ll want the ground to be as level as possible and free of tripping hazards like tree roots and large rocks.

Set Up
Once you’ve deployed your canopy tent, stake your legs and weight them if you need to, and stake out your guy lines. For safety, both for your campers and for your canopy tent, hang brightly colored flags on the guy lines to help folks see them and not trip over them. The last thing you want is someone yanking a guy line and ripping a hole in the covering.

What Size Do I Need?
Canopy tents vary in size and deploy quickly using a folding frame, usually at least two people are needed. Most are 10×10, but smaller and larger ones are available, some have overhanging eaves offering more shade, and some come with sidewalls for added protection from the elements. If the one you have or the one you want doesn’t have sidewalls, but you want the added protection from sun, rain, or wind, you can easily attach tarps using bungees or rope. I like to at least tarp the corner where my coolers sit to keep the sun off of them.

When deciding what size to buy, think of all the equipment you’ll want to have under the canopy, including your chuck box, totes, work tables, camp stove, Dutch oven table, etc.

Another thing to consider is how many bodies need to be working in your camp kitchen? Is it just you? Will you have sous chefs? If you regularly have helpers in the kitchen, you’ll want to allow for more maneuvering room.

What work zones will you need? You’ll probably want a designated space to wash dishes. You’ll definitely want a space for prepping and mixing.

At this point, it might be helpful to grab a pencil and some graph paper and sketch out your kitchen layout to ensure everything is under cover and you still have maneuvering room. Sketching a few different sizes and layouts will help you decide which size of canopy tent will best serve your needs.

Protection from the elements is important for you, your equipment, and the food you are preparing. A canopy tent should be high on your priority list. Where you like to camp will determine just how high on the priority list it actually is. For me, it’s a must have.

If you like this blog and don’t want to miss a single post, subscribe to Chuck Wagoneer by clicking on the Follow Us button in the upper right corner and follow us on Facebook and Pinterest for the latest updates and more stuff!

Categories: Cooking Outdoors | Tags: , , , , , , | Leave a comment

Is Your Camp Kitchen Layout Efficient?

There are lessons that we can learn from our home kitchens when setting up our camp kitchens.

In the 1920s and 1930s, the home kitchen underwent a massive renovation and has, for the most part remained consistent with neatly organized cabinets, counter space, easy-to-clean tiled backsplashes, and optimal layouts to maximize efficiency.

But what about our camp kitchens? Are they efficient? Can we easily access what we need? Do we have adequate work space? Is there a designated place for clean up? Is there a place for cooking with a Dutch oven or a box oven, and a place for starting our charcoal?

According to HGTV, the best kitchen layouts are Galley, L-Shaped, and U-Shaped or Horseshoe.

Galley Kitchen Layout
This efficient, “lean” layout is ideal for smaller spaces and one-cook kitchens. The galley kitchen, also called a walk-through kitchen, is characterized by two walls opposite of each other—or two parallel countertops with a walkway in between them. Galleys make the best use of every square inch of space. You typically see them any where there are tight quarters like airplanes, boats, submarines, motor homes and camper trailers.

L-Shape Kitchen Layout
An L-shaped kitchen solves the problem of maximizing corner space, and it’s a smart design for small and medium sized kitchens. The versatile L-shaped kitchen consists of countertops on two adjoining walls that are perpendicular, forming an L. The “legs” of the L can be as long as you want, though keeping them less than 12 to 15 feet will allow you to efficiently use the space. With an L-shaped layout, you’ll eliminate traffic: The kitchen will not become a thoroughfare because it’s just not logistically possible.

Horseshoe/U-Shaped Kitchen Layout
The horseshoe, or U-shape, kitchen layout has three walls of workspace. Like the L-Shape, this layout eliminates traffic because it is a dead end. Having three walls of workspace allows you to set up multiple workstations and is great for multiple cooks in the kitchen.

I prefer the horseshoe because it maximizes my work space and uses the traditional work triangle, which is efficient. I can set up my chuck box, a large camp stove, my Dutch oven table, and I can have 2 tables for work space with one doubling as a dish washing station. I can use the corners and the space under my tables for my food totes, coolers, general storage, and garbage containers. If you’re using a standard 10×10 canopy shelter, this still leaves a generous amount of space in the middle for maneuvering. It will still be tight, and if you have multiple cooks in the kitchen, you will be bumping butts; however, weather permitting, some folks could work on the outside perimeter of the canopy shelter.

If you’ve got a larger canopy shelter, something along the size of a 10×15 or 10×20, you could add a center island of tables for added work space and it could double as a serving area. Just set out all the food and eating utensils on the island and campers can file in on side, walk around the island to fill their plates, and exit out the other side.

Work Zone Concept
Over the years, the traditional kitchen has evolved into a more practical “work zone” concept and that can work in our camp kitchens as well. I almost always have helpers in my camp kitchen especially on scouting campouts. I’m always grateful when folks volunteer to help out. It lightens the load and makes for good socializing and memory making. And, if an issue arises, you have more heads to brainstorm a solution.

When laying out your kitchen, be mindful of where folks will be standing while they work and make sure everyone has access to equipment, food totes, coolers, and recipes.

Position your work zones to allow enough space for folks tending to pots on the camp stove, prepping ingredients, washing dishes, starting charcoal, or preparing biscuits or a dessert for baking. Folks are usually very understanding and courteous toward each other, but you still want everyone to have a little elbow room. I try to allow about 3 feet of space, which is what I have in my home kitchen between my counters and my small center island. My home kitchen is 12×10, which is just a little bigger than my 10×10 camp kitchen.

So, take a look at your home kitchen or think about the home kitchen you’d like to have. What do you like about it. How can you apply that to your camp kitchen? Take stock of what you got and think about what you need in your camp kitchen. Will it be just you in the kitchen or will you have others in the kitchen with you? What work zones do you think you’ll need? Do you need a place for Dutch ovens? Where will dishes be washed? How much “counter space” do you think you’ll need? And then start figuring out the layout that will work best for you and your sous chefs.

If you like this blog and don’t want to miss a single post, subscribe to Chuck Wagoneer by clicking on the Follow Us button in the upper right corner and follow us on Facebook and Pinterest for the latest updates and more stuff!

Categories: Cooking Outdoors | Tags: , , , , , , | Leave a comment

Cooking at Higher Altitudes

Cooking at higher altitudes can be challenging. When we’re camping, often times it is up in the mountains and the elevation gain may be enough to affect our cooking. A recipe that we tested at home, at sea level, now is taking longer to cook or is not quite right at higher elevations. When we’re backpacking, elevation can change dramatically from one day to another, so what took 20 minutes to cook yesterday might take longer to cook today because we are higher up.

As elevation increases, the atmospheric pressure decreases, or becomes thinner. The atmosphere becomes drier and liquids evaporate more rapidly, resulting in the need for changes in cooking methods. High altitude is defined as an elevation of 3,000 feet or more above sea level. Even at elevations of 2,000 feet, the temperature of boiling water changes from the standard 212°F at sea level to 208°F. Boiling or simmering foods at high altitude means lower temperatures and longer cooking times.

About 6 months ago, our family moved to a more arid state and we gained about 2,000 feet in elevation. Our everyday cooking has been a little challenging but we are adapting to this new climate and elevation. Here are a few tips to help you cook your food long enough and still keep it moist and full flavored.

Up Your Liquid

The higher the elevation, the faster moisture evaporates. When cooking foods like pasta or rice, start with more liquid in the pot and have some hot water standing by in case you need to add more during the cooking process. For example, my Pizza Pasta One Pot calls for 12 ounces of water. When I made that recently at 2,500 feet, I had to nearly double the amount of water for the pasta to completely cook. And, it needed longer to cook.

Pizza Pasta One PotPizza Pasta One Pot

Up Your Cook Time by 25%

Moist heating methods for pasta, rice, meat and poultry, even eggs, such as boiling, simmering or braising, will take up to 25% more cooking time. For example, if you are simmering a roast at 325°F that would usually take two hours to cook at sea level, that same roast cooked at high altitudes at 325°F would require 2½ hours of cook time. Increasing cook time does not apply to oven-roasted meat or poultry; oven temperatures remain unaffected in high altitudes. Use sea-level cooking instructions for oven roasting.

Resist the Temptation to Raise the Heat

Hiking up the temperature while boiling foods will not cook food faster. The liquid will simply boil away more quickly and food will dry out or worse, scorch on the bottom of the pan. The temperature of a boiling liquid cannot exceed its own boiling point, but the higher you are, the lower the boiling point. So, while water does reach its boiling point faster, it’s boiling at a lower temperature, which means you are cooking at a lower temperature. What you need is more time, so patience, Grasshopper.

Keep a Lid on it

Retain moisture in meat and poultry products or any boiled food by tightly covering the pan during cooking. To continue to keep foods moist, cover dishes after cooking.

Use a Food Thermometer

To avoid undercooking or overcooking meat and poultry, especially at high altitudes, use a food thermometer to confirm internal temperature. According to the USDA Food Safety and Inspection Service’s guidelines, internal temperatures should reach the following:

  • Ground meats such as beef, pork, lamb, and veal – 160°F
  • Beef, pork, lamb, veal (roasts, steaks, chops) – 145°F (and allow to rest for at least 3 minutes)
  • Ham, fresh or cook before eating – 145°F
  • Ham, reheat fully cooked – 140°F
  • Ground chicken or turkey – 165°F
  • Whole chicken or turkey – 165°F
  • Poultry pieces – 165°F

Bring More Fuel

Because we’re having to cook everything longer this will require more fuel, so make sure you pack more propane and more charcoal to ensure you don’t run out.

Experiment & Adapt

Every recipe will be a little different and the additional liquid and time needed for cooking will vary depending on your altitude. This is particularly true if you are baking because there is way more chemistry involved and almost every ingredient in baked goods is affected by the lower air pressure at higher altitudes, especially leavenings, liquids, and sugar.  If you like to camp at higher altitudes and you like to bake while camping, it might be worth it to invest in a high altitude baking cookbook and adapt the recipes to either a box oven or a Dutch oven.

So, while cooking at higher elevations can be more challenging, it’s nothing you can’t handle. All you need is a little patience, Grasshopper.

If you like this blog and don’t want to miss a single post, subscribe to Chuck Wagoneer by clicking on the Follow Us button in the upper right corner and follow us on Facebook and Pinterest for the latest updates and more stuff!

Categories: Cooking Outdoors | Tags: , , , , , , , , , | Leave a comment

Cheeseburger, Cheeseburger

Today is National Cheeseburger Day. Cheeseburgers are a staple of the backyard BBQ and camping. They are easy on the budget, simple to make, and folks can build their own, which satisfies the picky eaters and those with dietary restrictions. Burgers are completely customizable. And, you don’t have to have it the same way twice. You could probably build your burger different every time and never run out of options.

So how do you build your burger?

The Bun
You need to start with a good bun. Something sturdy that won’t turn to mush or fall apart in your hands. You need a bun that will stand up to the moisture from the condiments and the juice from the burger and keep its structural integrity. Options include, white, whole grain, gluten-free, brioche, kaiser, pretzel, and others. Serve them fresh out of the bag or spread on a little butter and grill them.

The Patty
You need a nice patty of protein. You can go with beef, turkey, pork, chicken, vegetarian or a combination. You can make thin patties and stack on a couple or go with thicker patties. Depending on the thickness, you’ll want to grill about 3 to 4 minutes per side. To test for doneness, insert an instant-read meat thermometer through the side of a burger into the center. The internal temperature should be between 145°F and 165°F, depending on how you like it.

Season your patties with just a little salt and pepper or kick it up with some seasonings like garlic powder, onion powder, ranch dressing dry mix, onion soup mix, and other spices. Make your patties like you would make a meatloaf or a meatball, using breadcrumbs and an egg. You could add a little Worcestershire, liquid smoke, or even beer.

Condiments
The condiment combinations are endless. Here are just a few ideas:

Mayonnaise
Cream Cheese
Relish
Ketchup
Mustard
Thousand Island, aka, Special Sauce
BBQ Sauce
Hot Sauce
Salsa

Extras
Again, endless combinations.

Cheese (too many to list)
Bacon
Lettuce
Pickles (Sweet or Dill)
Tomato Slices
Onion Slices (white, yellow or red)
Onion Rings
Fried Egg
Jalapeños
Coleslaw
Chili
Mushrooms (sautéed or fresh)

When we camp, we like to cook and eat well, but nothing beats a good cheeseburger with a side of potato or macaroni salad, baked beans, or a handful of chips.

However you build your burger, make it a good one!

If you like this blog and don’t want to miss a single post, subscribe to Chuck Wagoneer by clicking on the Follow Us button in the upper right corner and follow us on Facebook and Pinterest for the latest updates and more stuff!

Categories: Cooking Outdoors, Main Dishes, Recipes | Tags: , , , , , , , | Leave a comment

Blog at WordPress.com.