
Just because we’re camping doesn’t mean we skip dessert. On the contrary, camp is the perfect place to roll out something decadent because we all know that what happens in camp stays in camp. But baking can be challenging (there is chemistry involved), and it can be even more challenging in a camp kitchen.
And, for the record, we love boxed cake mixes and canned frosting. If you add a can of pie filling and a can of soda pop, you’ve got the makings for a great dump cake.
In camp or at home, if you’re looking to kick it up a notch, nothing beats a cake made from scratch. You don’t need to be an experienced baker to turn out a great cake, but knowing the basics helps.
First, Read the Whole Recipe
Always read all the way through a recipe before you start. Butter has to be softened, nuts may need toasting and chopping, chocolate may need melting. Ingredients like eggs and milk should be brought to room temperature or the ambient temperature in camp. Scanning the recipe helps you get a game plan in your noggin.
Mise en Place
This is a fancy schmancy French term pronunced: mi zɑ̃ ˈplas, which means “putting in place” as in set up. Set out all ingredients and pull out any equipment you may need. Measure and mix your dry ingredients, measure your wet, chop whatever needs to be chopped, melt whatever needs to be melted, have your charcoal ready to light. Get everything ready to go.
This is a good habit to get into no matter what kind of cooking or baking you are doing. It ensures you don’t forget an ingredient and, once you start, you won’t be interrupted because something needs to be prepped.
Prep Your Oven
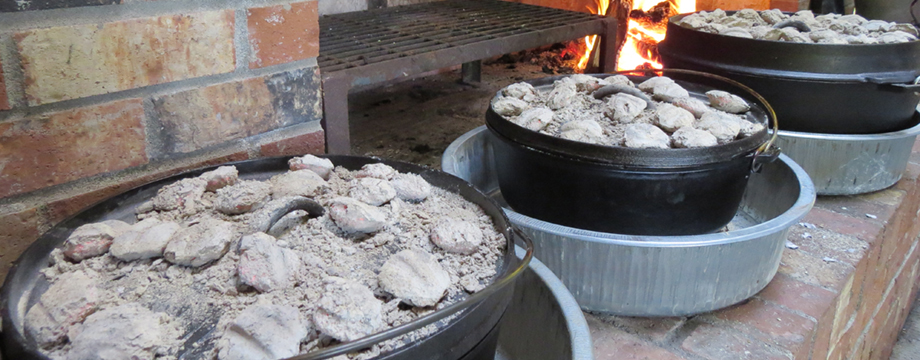
At home, remember to turn on your oven at least 10 to 15 minutes before baking so it has time to heat up. Likewise, in camp, make sure your box oven or Dutch oven is ready to go along with your charcoal in a chimney. Light your coals when you think you are about 15-20 minutes away from going “into the oven.”
Prep Your Pan
If the recipe requires it, grease and flour the cake pan before making the batter, so everything is ready to go when the batter is. To grease, use vegetable shortening on a paper towel. Vegetable shortening doesn’t darken as quickly as butter does, and it goes into crevices of fancy bundt pans, without puddling the way nonstick sprays do. To dust pans with flour, sprinkle them generously (for dark batter, use cocoa to avoid a white coating). Invert pan and tap lightly to remove excess.
Prep Your Dry
Measure all dry ingredients in metal or plastic measuring cups. I keep a complete set of metal measuring cups in my chuckbox. Always lightly spoon in flour and confectioners’ sugar, taking care not to pack it down or tap the cup. Fill to overflowing; level cup with a knife or straight-edge spatula. For packed brown sugar, press firmly into the cup.
Prep Your Wet
Measure liquids in a glass or plastic measuring cup specifically for measuring liquids. I like to place the measuring cup on the kitchen counter or the top of my chuckbox because it’s level (I always level my chuckbox when setting up my camp kitchen). Setting the measuring cup on top of my chuckbox also puts the measuring cup at eye level so I can read the mark accurately without stooping (I do enough stooping in camp tending to my charcoal and ovens). And, pour in the liquid all the way to the mark.
Use Real Measuring Spoons
The spoons in your flatware set are not standard cooking measurements. I keep a couple sets of metal measuring spoons in my chuckbox. That way, if I’m measuring something wet or something dry, I probably have a clean measuring spoon in the size that I need. And, yes, I’ve watched young chefs measure using the spoon from their mess kit.
Rack/Pan Position
At home, place baking pan on the middle oven rack, at least 1 inch from sides of oven, so heat can circulate. You’ll want to ensure good heat circulation in a box oven in camp. If you are baking in a Dutch oven, place a trivet in the Dutch oven to rest your cake pan on (if you’re not cooking directly in the oven). After minimum baking time, touch center of cake lightly with your fingertip. If no imprint remains, or if a wooden toothpick inserted in center of cake comes out clean, cake is done. In camp, I usually recruit a helper who either lifts the box oven or the Dutch oven lid so I can quickly test and then they quickly set it back down. Every time you lift the box or the lid, there is huge heat loss so you want to work as quickly as possible to retain as much heat as possible in case the cake needs more time.
Cool Down Time
Allow cake to cool in pan 10 to 15 minutes on a wire rack. If you leave it in the pan too long, it will steam and get soggy. Then run a knife around edge and invert cake onto a wire rack to finish cooling, about 2 hours for thick cake pans, bundt pans, and fluted shapes. Frost, glaze, or dust with confectioners’ sugar.
Now, you have a cake that should win you some Ooos and Aaahs. We like cake.
If you like this blog and don’t want to miss a single post, subscribe to Chuck Wagoneer by clicking on the Follow Us button in the upper right corner and follow us on Facebook and Pinterest for the latest updates and more stuff!


Recent Comments